How to Get Saved Power Director Uploaded on Fb
How to use PowerDirector Mac

CyberLink PowerDirector is 1 of the best consumer-level video editing programs. It has a great range of features, regular updates, and a skilful-value subscription cost. For nigh of its history, information technology's been a Windows-only plan, but in December 2020, PowerDirector was finally made bachelor for Mac.
It can be tricky for beginners to get to grips with all its features, so in this article, we'll guide you through the central stages of editing a video using PowerDirector Mac. Fore more info on PowerDirector, see our PowerDirector review, or for other editing options, explore our list of the best video editing software.
How to apply PowerDirector Mac: Preparation
Before you get started, you need to download and install PowerDirector. Brand certain you meet the organisation requirements: you need Mac OSX 10.14 or later, at least 4GB of RAM (6GB is recommended), 128MB of VGA VRAM, and 7GB of gratuitous hard disk infinite.
PowerDirector is bachelor from CyberLink'due south website – or see beneath. At that place's a free trial version, called PowerDirector Essentials, which has no time limit just significantly reduced features. For the total version, you lot demand to sign up for a subscription, which costs $69.99 a yr or $19.99 a month.
Once you've called your plan, you'll be able to download a .dmg file. This isn't the program itself but a downloader. When yous open this, it'll have you through a simple set of steps to download and install PowerDirector. Once this is done, PowerDirector volition be found in your Applications folder. Load it up, and it'due south time to get started editing.
01. Launch PowerDirector
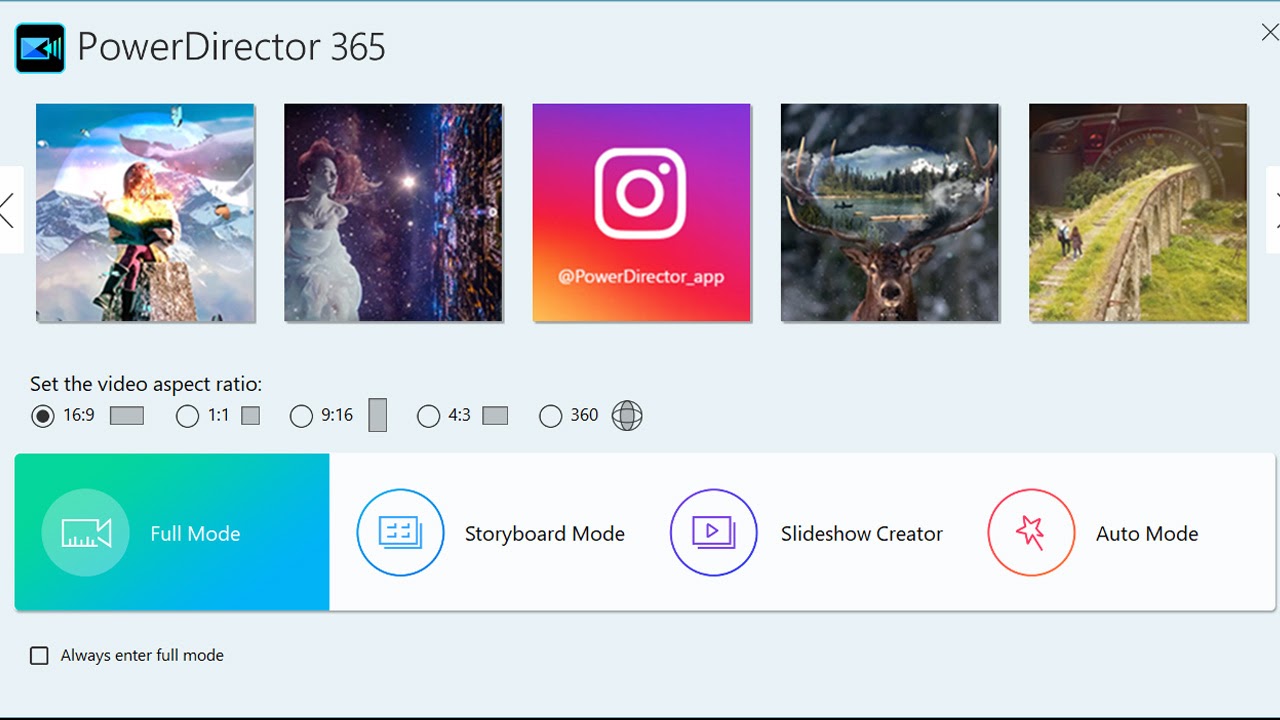
When y'all first open PowerDirector, you'll be given a choice of four different modes: Full, Storyboard, Auto, and Slideshow Creator. Storyboard arranges your clips as a storyboard-like graphical display rather than a timeline, Auto features a wizard which guides beginners through basic edits, and Slideshow Creator is used for creating photo slideshows in video format.
Full Style is where you'll spend most of your time. Its interface has four tabs: Capture, for recording videos; Edit, for nigh of the editing work; Produce, for exporting videos; and Create Disc, for burning projects onto a disc.
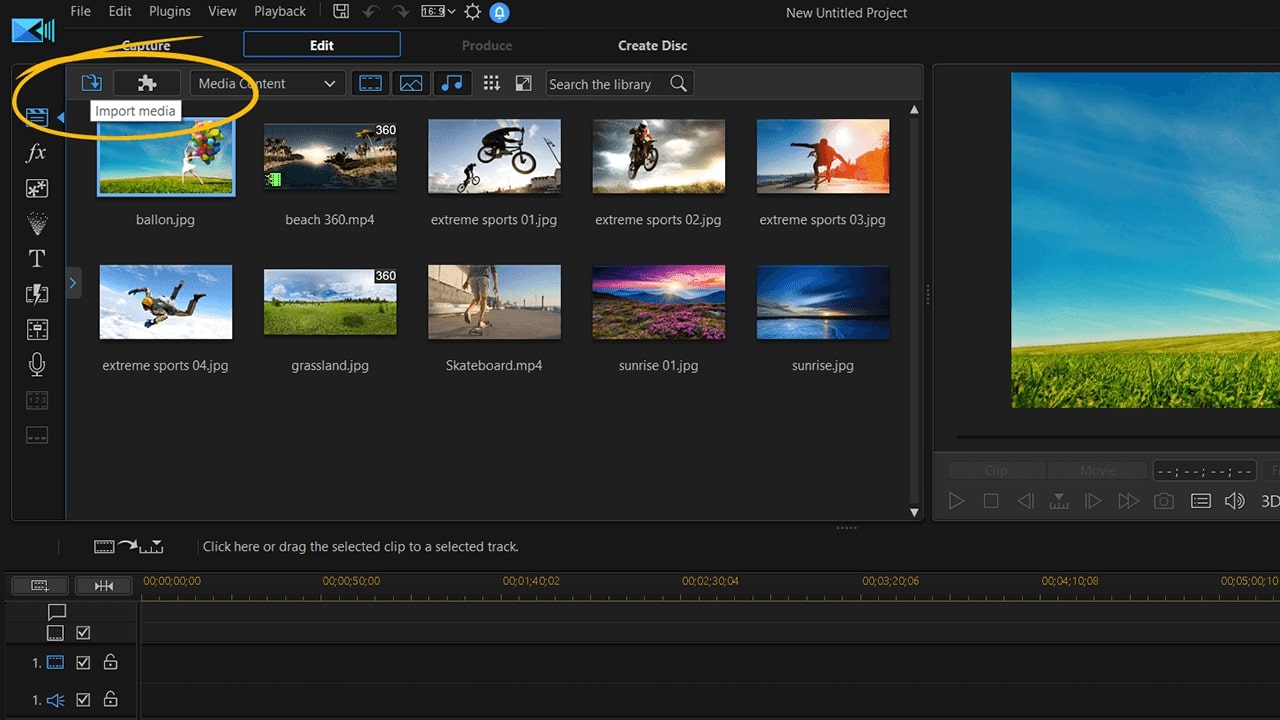
In the top left of the Edit tab is the media room, where all your video clips, sound clips, and still images are stored. To import media, only drag and drop clips from Finder into the media room, or click the Import Media icon in the top left and find the clips on your computer.
To organise clips within the media room, you tin add tags. Click the Add Tag button on the left to create a tag, and then drag clips into the tag. This helps categorise clips past scene, location, or subject, for example. You can also use the top bar to filter past media type or to switch between list and icon views.
03. The timeline and preview windows
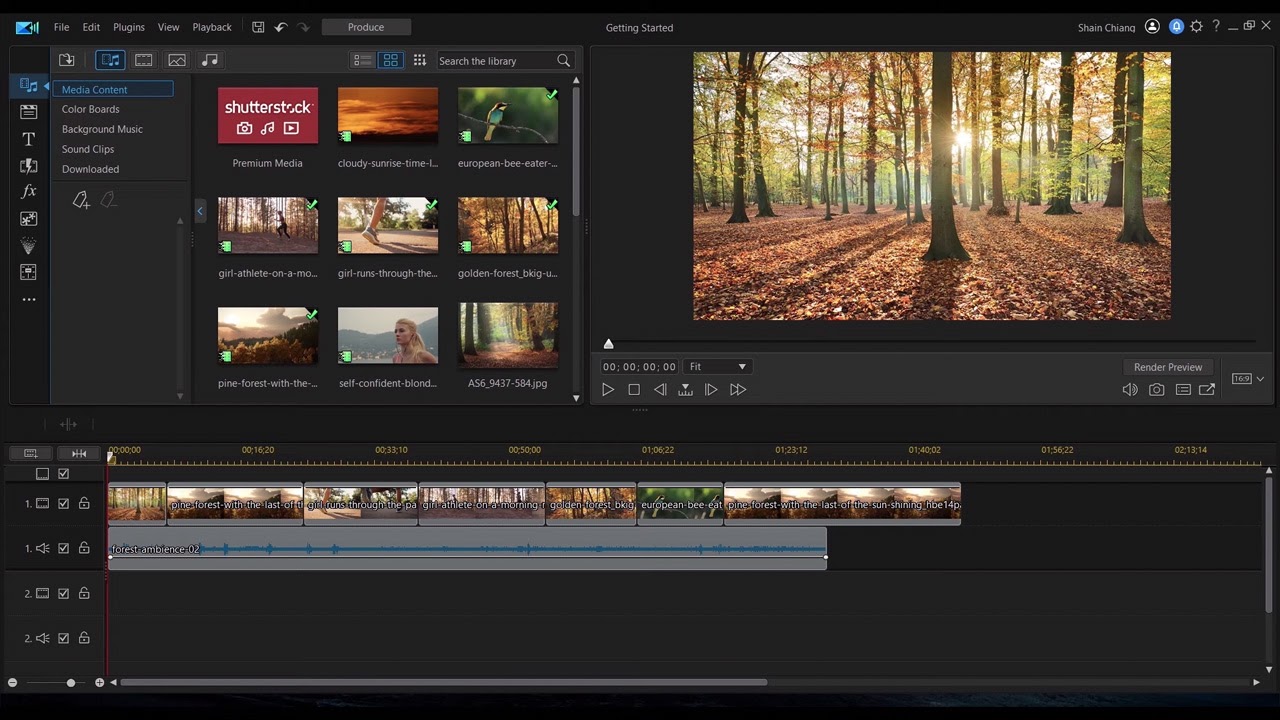
Along the lesser of the editing interface is a multitrack timeline, on which yous will assemble your video. To add clips, drag them from the media room to the timeline. Y'all tin can movement clips around your timeline and layer them on tiptop of each other.
The preview monitor in the superlative right of the screen is where you tin can either preview clips you have selected in the media room, or picket the associates of clips on your timeline, depending on what yous terminal selected. Drag the red bar across your timeline to select role of your edit to preview.
04. Trimming clips
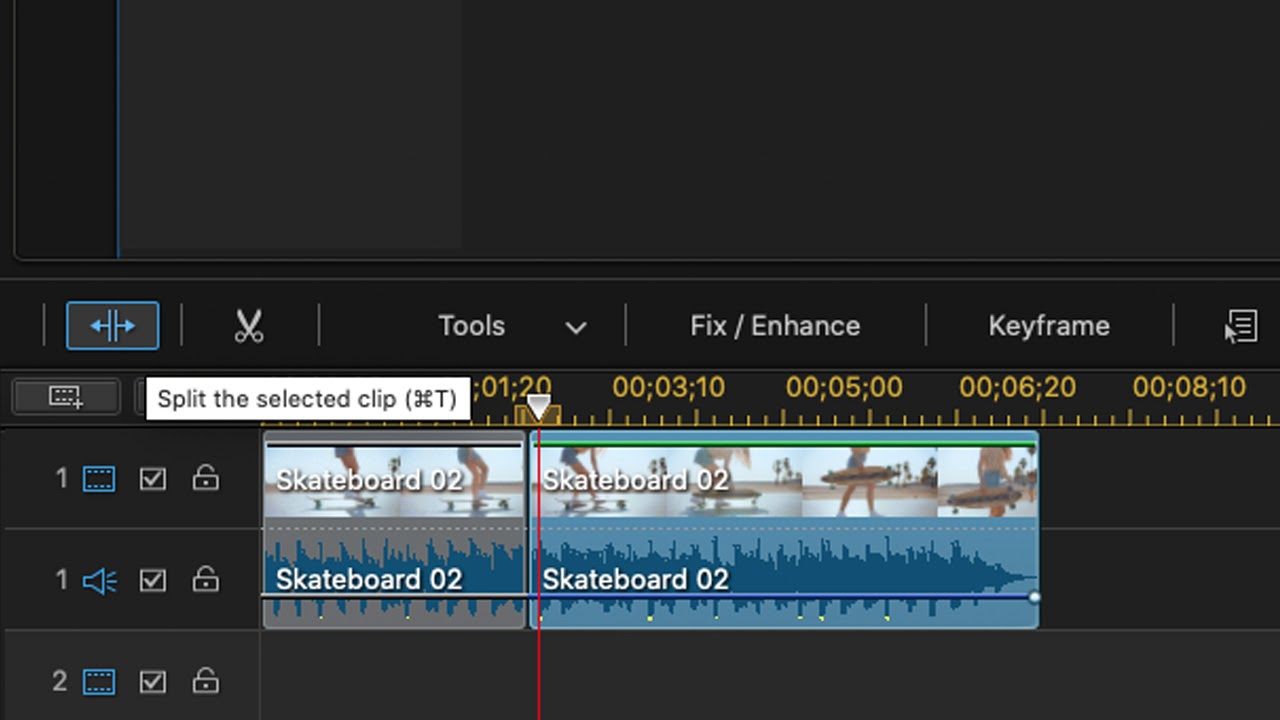
Oft, you lot won't desire to employ a full video clip. You can choose a section before adding it to the timeline past right-clicking on information technology in the media room and choosing Precut.
Or, you can trim in the timeline past dragging the stop of the prune, by dragging the red bar to a point yous want to cut at and clicking the Divide Clips icon on the bar above, or by highlighting a clip and clicking the scissors icon to open a trimming window.
05. Transitions
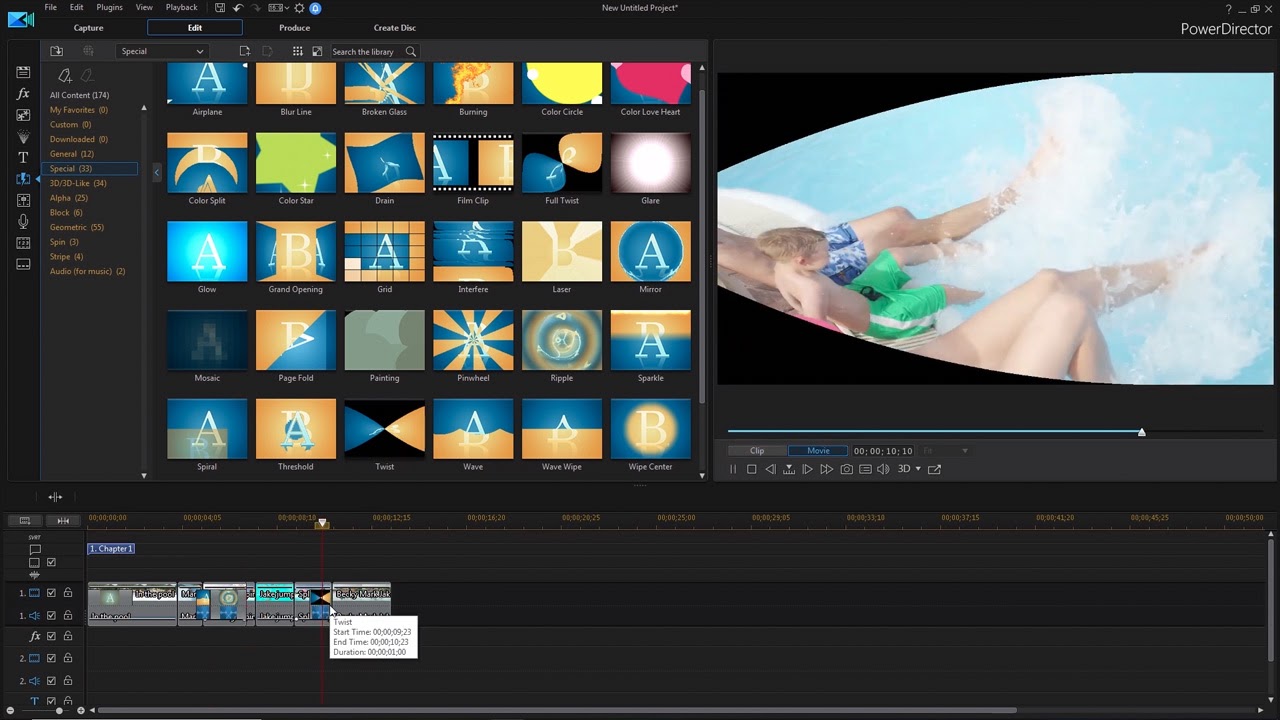
To find PowerDirector's library of transitions, click the transition room button on the top left bar. You can preview all available transitions from here, and to add one to your video, drag and driblet it to the signal where one clip touches the next.
You'll now run into the transition appear on the clip in the timeline. Double-click on it to open the transition settings panel, where yous can arrange duration and behavior. To remove a transition, highlight it and press backspace.
06. Add video effects
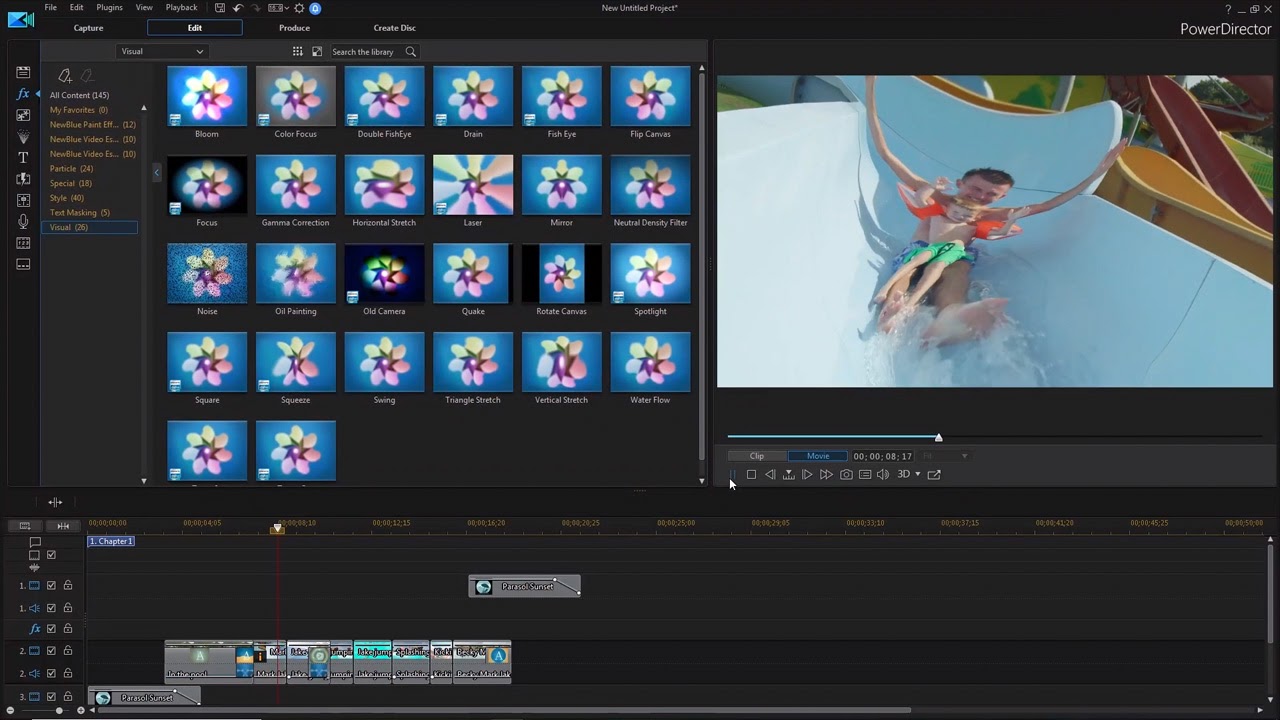
PowerDirector has a range of video effects, including colour balance, spotlight, and stretch. Click the FX symbol on the height left bar to open the effects room. And then, elevate an consequence onto a clip on the timeline.
An effects symbol will appear on clips with effects applied, and clicking on this will open up up a settings panel. Each type of effect has its own settings that can be modified. You can also add together keyframes to an upshot hither – this means you can set unlike effects values for particular frames in the clip, and so PowerDirector volition automatically scale the effects between these keyframes.
07. Audio levels
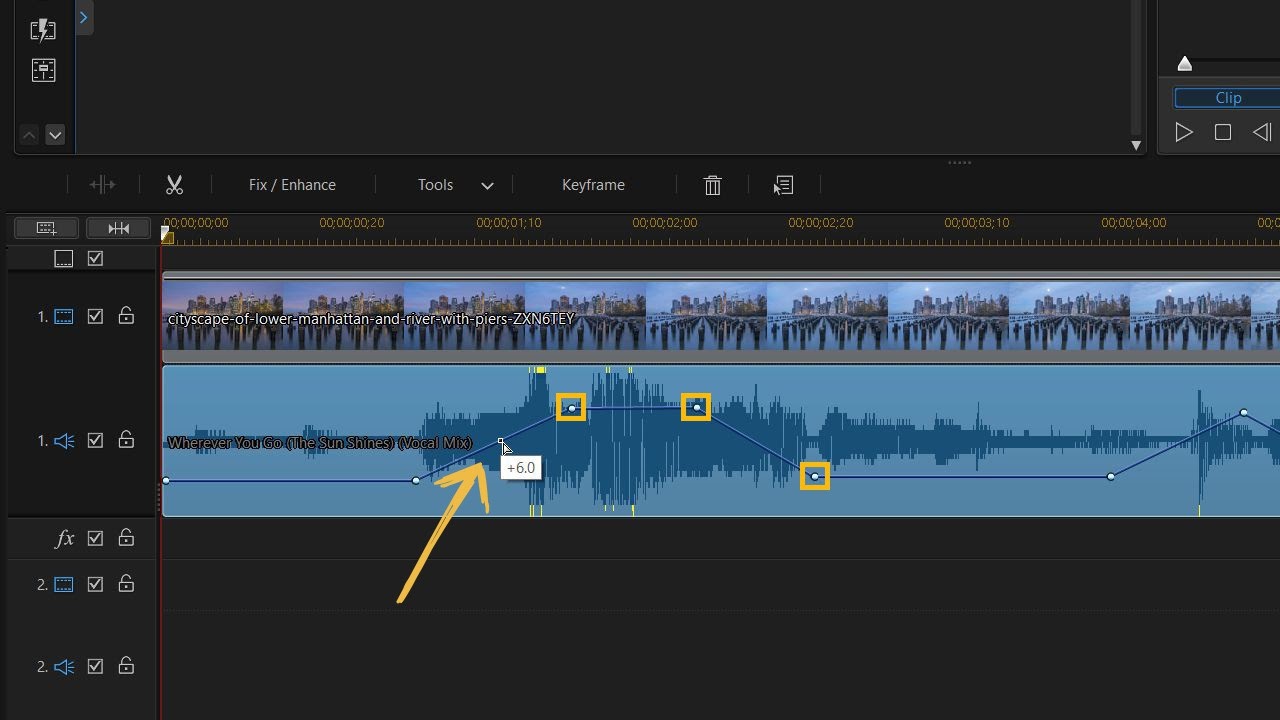
Sound clips are added and trimmed the aforementioned style every bit video clips. The clip'southward graphic in the timeline volition take a book line beyond it. Elevate this up or down to adapt the volume.
If you desire the volume to alter over fourth dimension – eastward.m. for a music track to go quieter when someone is speaking in a simultaneous clip – you can use keyframes. To add a keyframe, concord Ctrl and click on a point on the prune. Set a level for each keyframe past dragging it upwardly and downwards, and PowerDirector volition automatically calibration the volume betwixt keyframes.
08. Titles
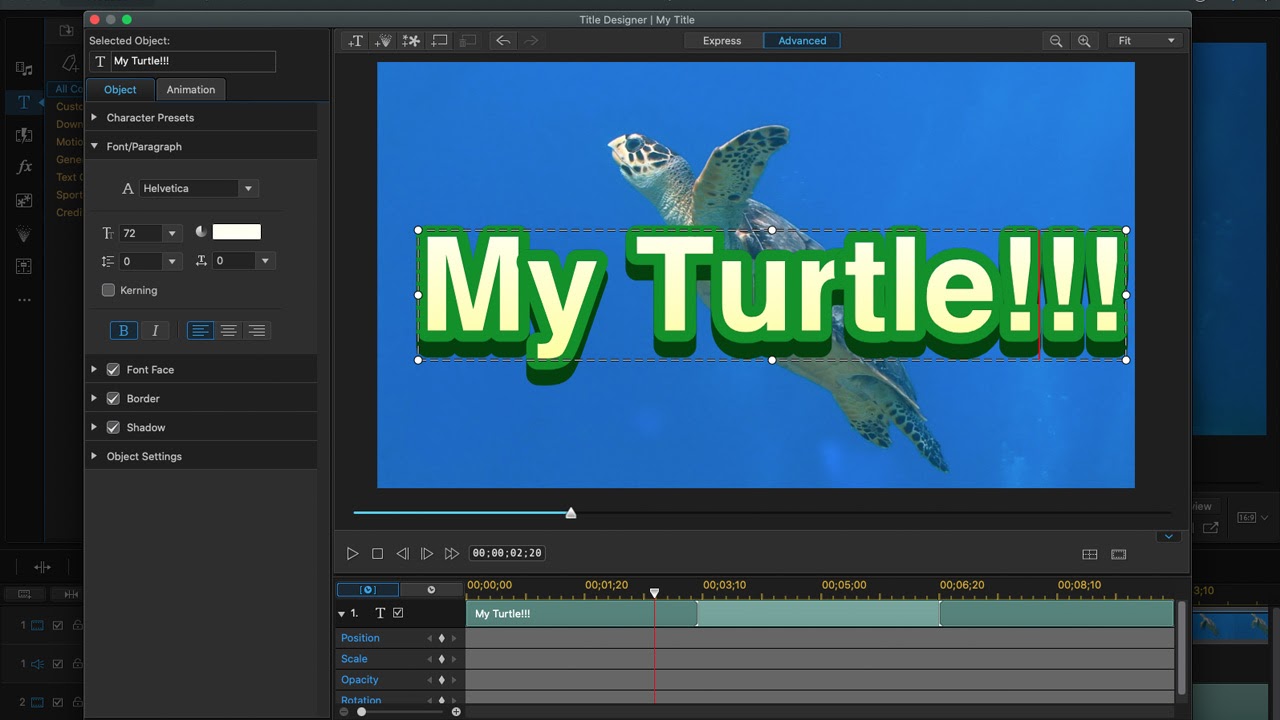
Click the T symbol on the summit left bar to open the title room. Here, you'll meet various title presets. Drag the one you desire onto the timeline. If yous place it on a track below a video clip, the championship will appear on top of the clip.
Double-click on a championship on the timeline to open the Championship Designer. Hither, you can write the text and adjust its backdrop, including color, font, and shadow. Under its Advanced tab, you can also adjust the title's animation.
09. Exporting
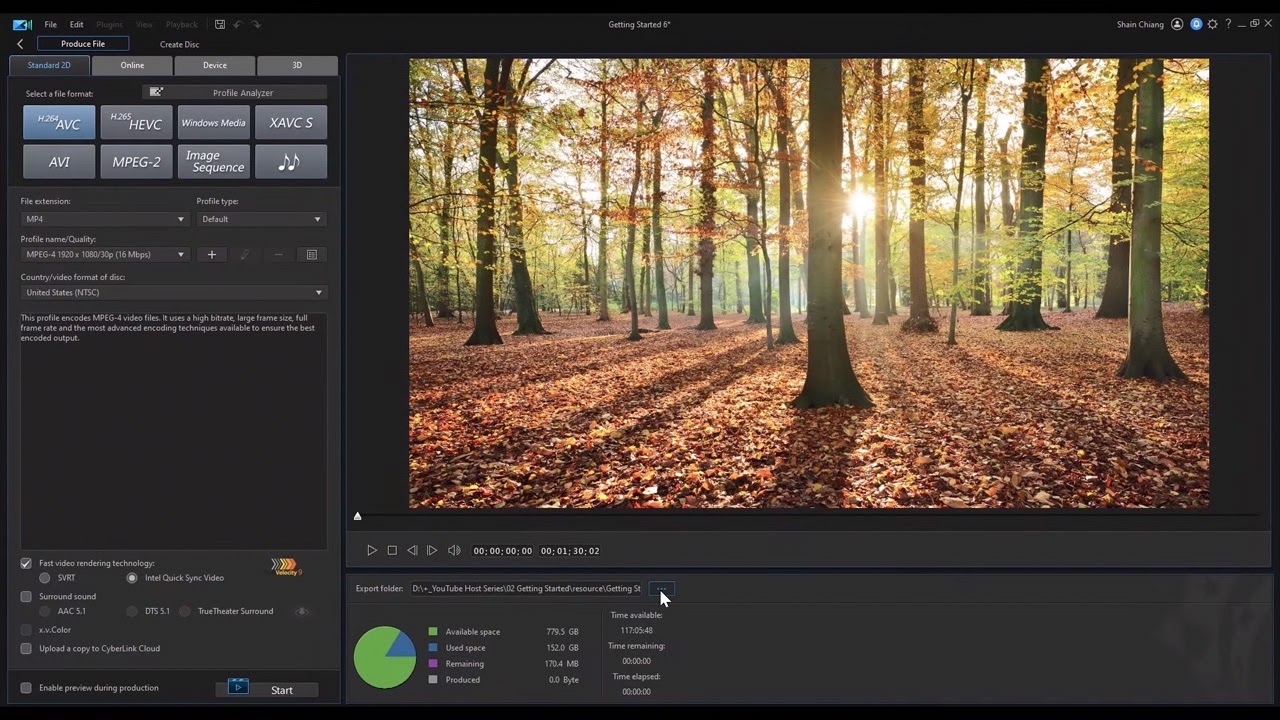
When you've finished editing your video and are ready to share it with the world, become to the Produce tab. Here, under the Standard 2nd option, cull a video file format, salve location, and file name, then press Kickoff.
This page also has an Online option, which is uniform with YouTube, Dailymotion, Vimeo, and Facebook. You tin use this to export your video in a format optimised to a particular web platform and directly upload to it.
Read more:
- Hitfilm Limited fifteen review
- The best video editing apps
- The best computer for video editing
Related articles
cookreprockless1958.blogspot.com
Source: https://www.creativebloq.com/how-to/use-powerdirector-mac
0 Response to "How to Get Saved Power Director Uploaded on Fb"
Post a Comment